Shooting holiday lights
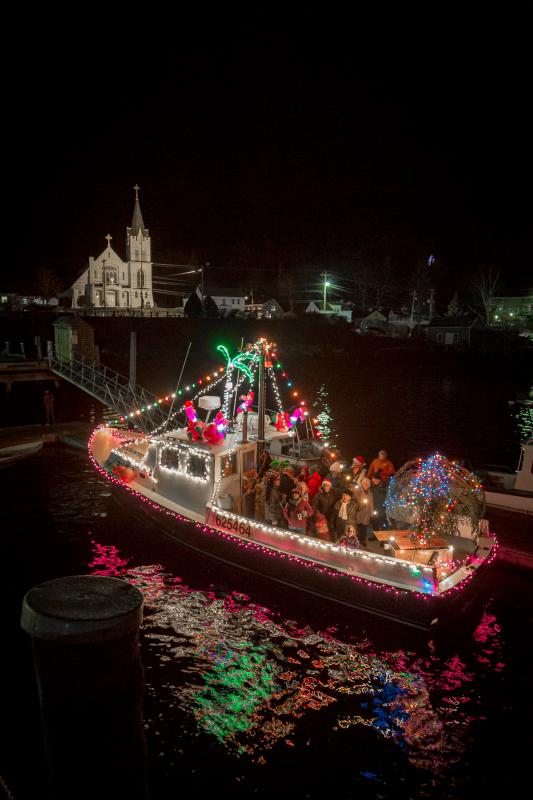 ISO 4000 1/8th - f/4 This was shot at the higher ISO to mitigate the motion of the boat in the water. A lower ISO would have meant a longer exposure and a blurred boat. Michael Leonard photo
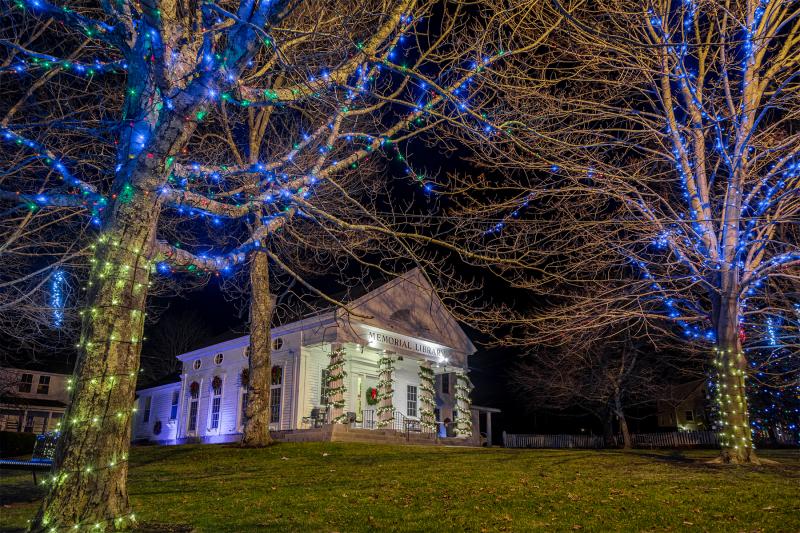 ISO 400 1/5th - f/5.6 - Because of the darkness of the sky and the foreground, I had to underexpose this shot so as to not have the building too bright and to capture all of the details in the trees. Michael Leonard photo
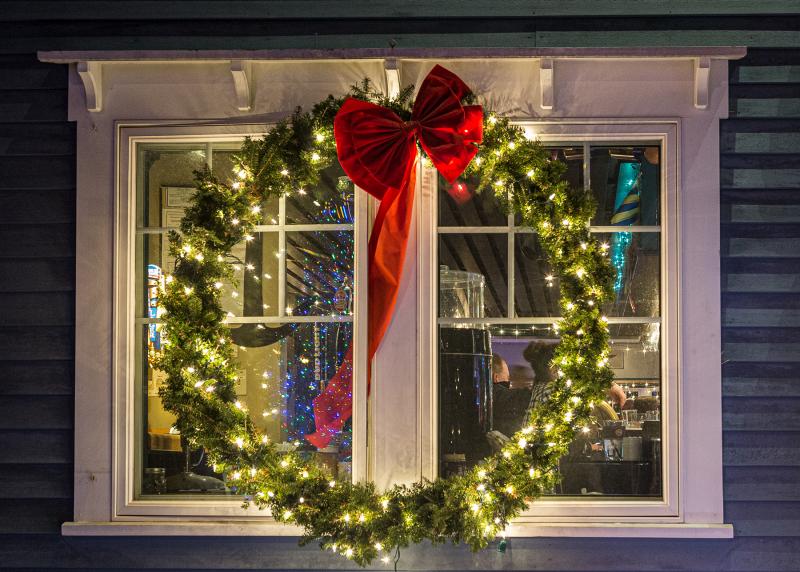 ISO 2000 1/5th - F/5.6 - I stopped down a little to gain some depth of field to have the wreath, the building and through the window all mostly in focus. Michael Leonard photo
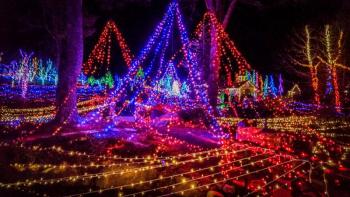
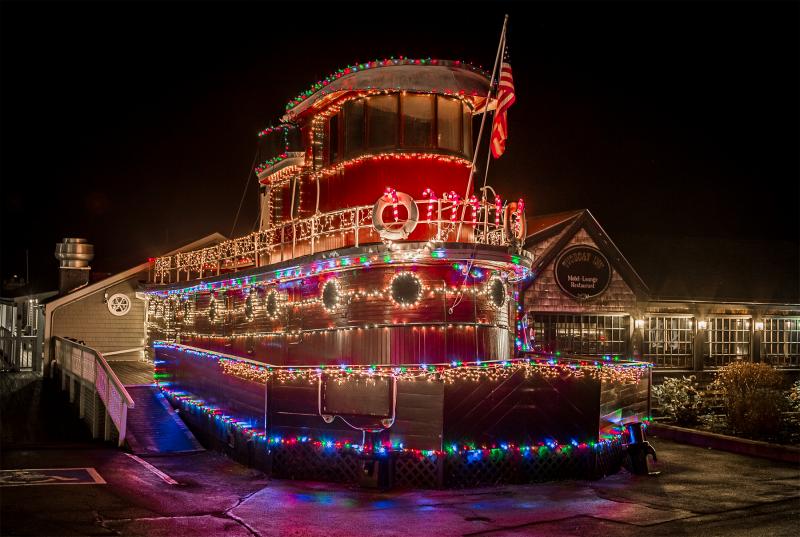 ISO 800 1/40th - f/5.6 - This shot was underexposed to capture all of the tonality - in auto mode the lights would have been blown out. I wanted to see detail on the structure and the colors of the lights and underexposing this allow for that. Michael Leonard photo
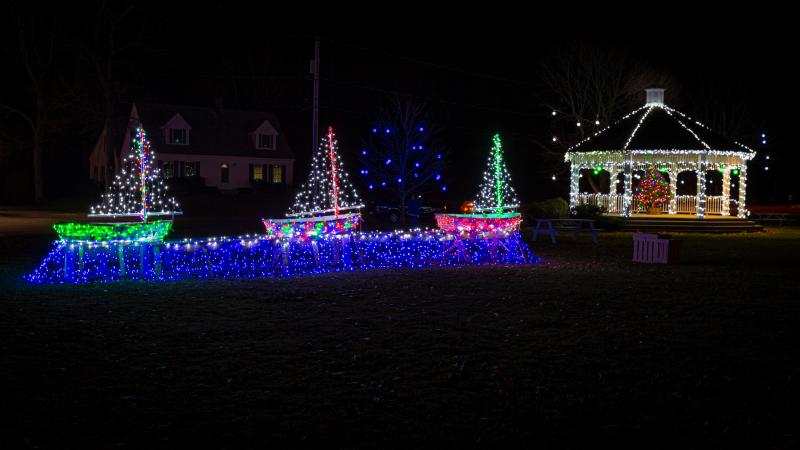 ISO 320 1/16th - f/ 6.3 - there is a case where you need to underexpose to get the colors in the scene. Shooting in Auto would have blown out the lights making them look all white. Michael Leonard photo
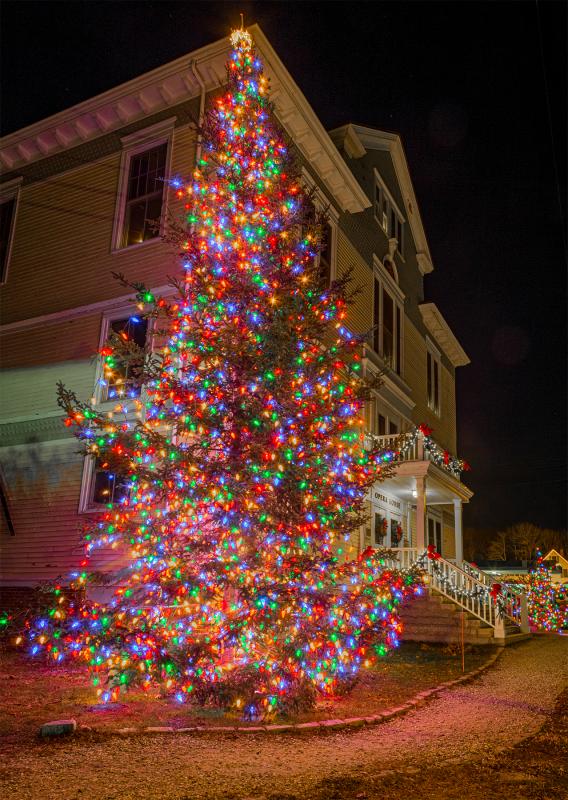 ISO 640 - multiple exposures - F/13 - This is an HDR shot made from 7 images shot at different exposures then composited. F/13 was chosen to get the foreground and the background both in focus. The colors are conflicting between the street light, the lights on the tree and the lights on the Oprah House. Shooting Daylight WB made some parts of the scene a little orange that were later reduced in editing but kept the colors of the lights. Michael Leonard photo
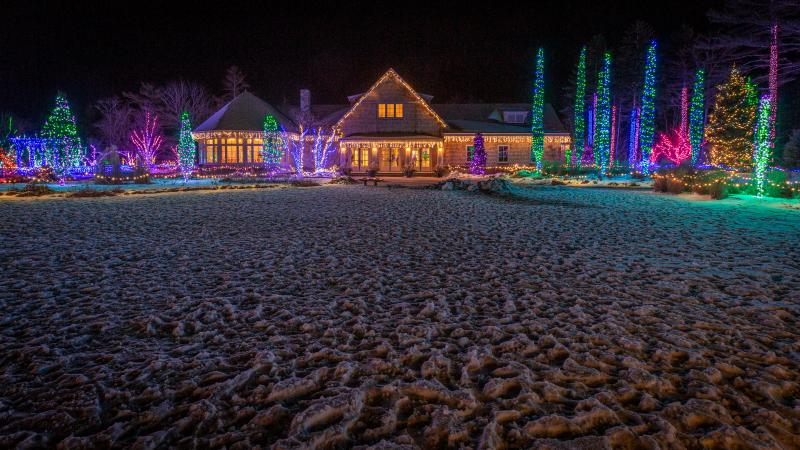 ISO 2000 1 second - f/11 - A higher ISO was chosen to be able to shoot at f/11 giving a depth of field to keep the foreground and background in focus. Michael Leonard photo
 ISO 3200 1/25th f/3/2 - Because the subject was moving a faster shutter speed was required and to collect enough light a higher ISO was required. Michael Leonard photo
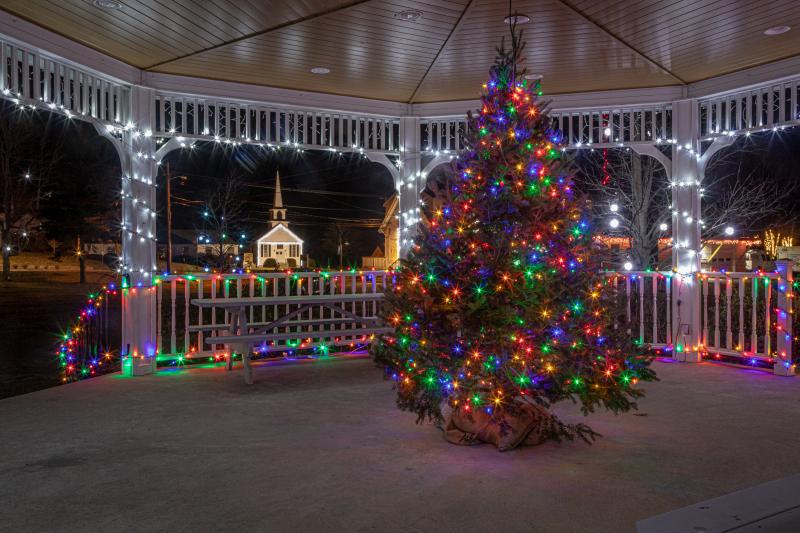 ISO 1250 5 seconds f/20 - shooting at an F/Stop of 20 or 22 you can gain a star pattern on spectacular highlights which is what I did here. The higher ISO and longer shutter speed was needed to collect the light at that significantly reduced aperture. Michael Leonard photo
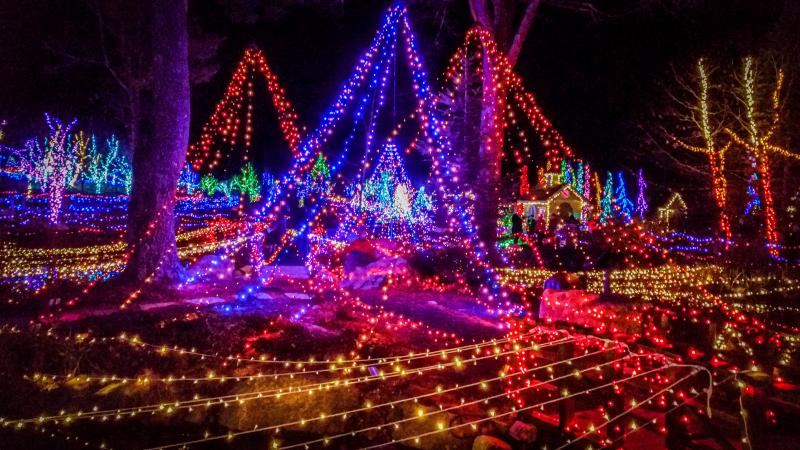 Cell phone shot - Daylight White Balance. Phone held steady against a post. Exposure adjusted in the phone to underexpose to capture the colors of the lights. Michael Leonard photo
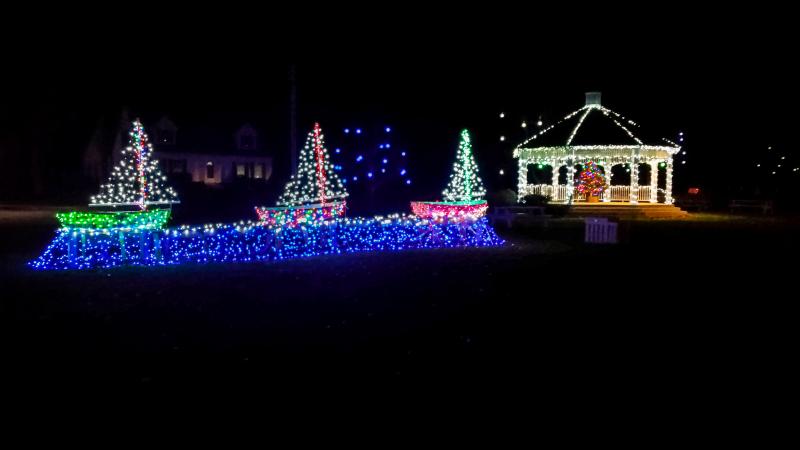 Cell phone shot - Daylight White Balance. Phone held steady with the use of a tripod. Exposure compensated to darken the scene to capture the color of the lights. Michael Leonard photo
 ISO 4000 1/8th - f/4 This was shot at the higher ISO to mitigate the motion of the boat in the water. A lower ISO would have meant a longer exposure and a blurred boat. Michael Leonard photo
 ISO 400 1/5th - f/5.6 - Because of the darkness of the sky and the foreground, I had to underexpose this shot so as to not have the building too bright and to capture all of the details in the trees. Michael Leonard photo
 ISO 2000 1/5th - F/5.6 - I stopped down a little to gain some depth of field to have the wreath, the building and through the window all mostly in focus. Michael Leonard photo
 ISO 800 1/40th - f/5.6 - This shot was underexposed to capture all of the tonality - in auto mode the lights would have been blown out. I wanted to see detail on the structure and the colors of the lights and underexposing this allow for that. Michael Leonard photo
 ISO 320 1/16th - f/ 6.3 - there is a case where you need to underexpose to get the colors in the scene. Shooting in Auto would have blown out the lights making them look all white. Michael Leonard photo
 ISO 640 - multiple exposures - F/13 - This is an HDR shot made from 7 images shot at different exposures then composited. F/13 was chosen to get the foreground and the background both in focus. The colors are conflicting between the street light, the lights on the tree and the lights on the Oprah House. Shooting Daylight WB made some parts of the scene a little orange that were later reduced in editing but kept the colors of the lights. Michael Leonard photo
 ISO 2000 1 second - f/11 - A higher ISO was chosen to be able to shoot at f/11 giving a depth of field to keep the foreground and background in focus. Michael Leonard photo
 ISO 3200 1/25th f/3/2 - Because the subject was moving a faster shutter speed was required and to collect enough light a higher ISO was required. Michael Leonard photo
 ISO 1250 5 seconds f/20 - shooting at an F/Stop of 20 or 22 you can gain a star pattern on spectacular highlights which is what I did here. The higher ISO and longer shutter speed was needed to collect the light at that significantly reduced aperture. Michael Leonard photo
 Cell phone shot - Daylight White Balance. Phone held steady against a post. Exposure adjusted in the phone to underexpose to capture the colors of the lights. Michael Leonard photo
 Cell phone shot - Daylight White Balance. Phone held steady with the use of a tripod. Exposure compensated to darken the scene to capture the color of the lights. Michael Leonard photo
A lot of people put their cameras away when the sun sets because shooting after dark can be challenging and the results can be disappointing. With the holiday lights upon us, you can make some memorable images if you just take a few minutes to become familiar with some important settings on your camera or in your cell phone camera, It is much easier to look for and practice these settings in the daylight hours so you can be better prepared when making images when it is darker. Many cell phone cameras make amazing images under low light in just the auto mode but there are some settings that you can choose that can make the images look even better and they are just a simple menu button push away in many instances.
Here are some camera and cell phone camera settings that are worth familiarizing yourself with that will also let you take better images anytime you photograph.
♦ Keeping your camera steady for the exposure is very important to prevent motion blur. A tripod is the best choice for keeping a camera still and there are tripod mounts that will accommodate a cell phone camera. Just as you buy pants of a certain size to fit, you need to get a tripod that also fits you and that is easy to use. Try on a tripod — so to speak — to make sure it is not too tall or too small when the legs are fully extended. With the center column down you should be able to look through your viewfinder at eye level when standing without having to be on your tip-toes or bending over. A quick release head will let you mount and unmount your camera from the tripod head in just seconds. Simply put, the easier your tripod is to use the more you will use it. Consider spending at least 15% to 20% of the cost of your camera for a good tripod that will last for years.
♦ A remote shutter release cable will help keep your camera steady when pushing the shutter button but as an alternative you can also use the built in self-timer. Touching the camera causes vibration that can make for a blurred image and using the 10- or even the 2-second timer that is built into most cameras you can let the camera stabilize before making the shot. Most cell phones have a voice trigger word that can be enabled to take a shot without needing to touch the camera that will also minimize vibration. Again consider practicing these settings and modes before you go out at night.
♦ White Balance (WB) We can describe light in many ways such as the direction or the intensity of light but in this case we are interested in the color of the light. To better illustrate, just look at oncoming headlights at night and you will notice how some look more blue and others look more orange. The term for the color of light is Color Temperature. You need to tell the camera what color temperature light you are shooting under. While it may seem complicated at first setting, WB is almost embarrassingly easy. Most cameras indicate the setting in several ways — some show icons of the Sun, a cloud or a light bulb while other spell it out in plain English “Daylight,” “Cloudy,” or “Incandescent” or “Tungsten.” Yet, some will refer to the setting in a numeric form in degrees: Kelvin where 5600 is Daylight, 6500 is Cloudy and around 2900 is Tungsten. You may need to select Daylight WB for LED bulbs and for the traditional filament (hot) lights choose Incandescent or Tungsten WB. As tempting as it sounds the Auto mode is often not the best choice and in a lot of instances it would be better if it was spelled “Awful,” just to remind you to take the mere seconds to set the WB. All digital cameras have White Balance setting modes and once you start using them it will be second nature to set it. Most all Android phones have this ability, too, if you go to Pro mode and choose WB in your camera shooting menu. Some phones make this easier than others. Apple happened to removed the ability to set White Balance so you will need to download an app, such as Adobe Lightroom, that will restore that function and more for free.
♦ Exposure can be a challenge when shooting at night. The ISO setting determines the sensitivity of your camera to collect light — the higher the ISO number the more light sensitive but also the more noise or grain you will have in your shot. Often we need to shoot at high ISO to capture dim light at night or to capture moving lights, such as the lighted boat parade. In the case of stationary holiday lights we don’t need that higher ISO since we are looking to shoot a source of the light — the light bulbs themselves. It is easy to set the ISO in a DSLR camera and I would start at ISO 400 and adjust as needed. Cell phone cameras can be adjusted with use of an application that enables those settings.
♦ The ratio of the brightness to darkness is related to Dynamic Range and that range can be extreme when shooting holiday lights at night. To mitigate this, try using the HDR or High Dynamic Range mode in your cell phone. HDR is the mode you would normally use for sunrise and sunset shots, too, but can be useful when shooting lights at night. Some DSLR’s have this mode built in but for those that do not simply bracket your exposure by shooting multiple images at different exposures and use a photo editing application to create an HDR image.
♦ Auto focus may not work in low light situations and may even prevent you from taking a picture with a digital camera. Shutting off the auto focus function, usually found on the lens, will let you focus manually. Most cameras have a “live view” option with an image magnifier that you can use to assist with focusing that works very well.
♦ If you can capture in Camera Raw mode, always prefer that to JPG so you can do more with image editing after you shoot. That will involve some image editing software that is usually bundled with your camera or is included in the Adobe Lightroom application for your cell phone as mentioned earlier. Being able to adjust the exposure and white balance settings after you shoot can give you more abilities to help you to make the best shot.
♦ Colder air temperatures will likely mean a shorter battery life. Spare charged batteries are always a good idea and anything you can do to help keep them warm will mean that you can shoot for longer.
♦ Another consideration with the colder temperatures is the possibility of condensation when going from a cold and dry environment place to a warm and humid place. It’s best to protect the camera from this moisture by shutting it off and letting it acclimate to the difference in temperature. It may take a while depending on how cold your camera is. Do not remove the lens or the inside of the camera could also fog up. Speeding the process along by using a blow dryer or other heating device may not be the best or safest solution for your camera.
♦ The stock lens that came with your camera will do a good job and is a good starting point. It might be worth upgrading to a low light lens — one with a low f/stop number like f/2.8 or lower — to be able to collect more of the available light. These lenses have many other uses including when shooting indoor or nighttime sports. Low light lenses come at a higher price and if you are not ready to take the plunge there are lens rental companies where you can get one to use for a specific assignment.
♦ Processing your images could easily be a whole other article — the software that came with your camera can be a good free starting point but to step up to the next level an image editing program like Adobe Photoshop or Adobe Elements are some good choices to consider. I lead an Adobe User Group where you can come learn Photoshop for free on most Friday nights. Visit my Friday Night Photoshop Facebook page for more details and for info about coming sessions.
I will be on hand on Dec. 4 to help folks take their best shots at the Gardens Aglow, where I look forward to meeting people and helping them to make their best shots.


